

Oracle paintings are fairly-traded acrylic on canvas. Each one is carefully hand painted, left on its frame and is wrapped and shipped by boat to Canada. Changes in humidity, temperature and other factors sometimes cause the canvas to dent, or bubble and the wood frame to warp or bend.
Water is the friendly solution.
If your canvas bubbles or dents, just spray the BACK side of the painting on the problem area and hang back on your wall. It will fix itself by the time it dries.
If your wooden frame has warped. Place the painting face down on a covered surface, spray the wood until quite wet. Then weigh down all four corners to flatten. Remove weight when dry and it should be much improved.
We recommend hand washing your Oracle fashions:
PREPARATION:
Separate Colours
Treat Stains Immediately. Never let a stain sit. Quick pre-treatment can make the difference between a short, effective hand-wash later and a permanent stain.
Fill a large basin, tub, or sink with lukewarm water
Stir in a mild detergent.
WASH:
Gently submerge your garments and then swish them slowly from side to side for about five minutes.
RINSE:
Gently submerge your garments in fresh water and then swish them slowly from side to side for another five minutes.
DRY CLOTHING FLAT
Delicate clothing, whether it’s been hand-washed or washed on a delicate cycle, generally needs to be air-dried. That means “dried by sitting out in the air,” not tumbled in a hot-air drier, and the best way to do that is lying flat.
GONNA USE A WASHING MACHINE ANYWAYS?
Use the “delicate” setting on the machine to aid in gentle washing. If cycles are listed in terms of heat and length instead, go for a “cool” or “warm/cold” or similar setting (definitely never hot) and a short wash cycle.
CRINKLE COTTON
If it seems to shrink, just iron or steam and it returns to it’s original state.
NOT TO BE FOLLOWED! These labels made us giggle:


Keep your silver bright!
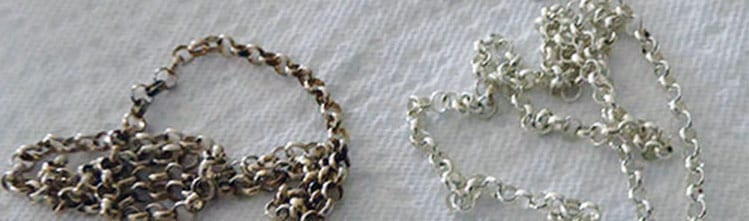
Avoid Exposure: Contact with household chemicals, chlorinated water, make-up, lotions or hairspray will cause corrosion and tarnish. Direct sunlight also causes silver to tarnish, so be sure to take off your silver jewelry before swimming and sunbathing.
Storage: As exposure to air tarnishes it, storing silver in airtight plastic bags with anti-tarnish strips is a great preventative measure. Just make sure you don’t store multiple jewelry pieces in the same bag: silver is a soft metal, so the individual pieces can scratch each other. If you can’t use plastic bags, try to make sure that the storage area has low humidity. You can also place a piece of chalk, a packet of activated charcoal, or a container of silica gel in the storage area to minimize tarnish.
Polishing: Simply polishing your silver with a ‘silver polish cloth’ works well when the tarnishing is not too severe. It’s also the best method for cleaning oxidized silver, as you can stay away from the intentionally tarnished areas.
When polishing, use long back-and-forth motions that mirror the grain of the silver. Do not rub in circles, as this will magnify any tiny scratches. Also, change to a different section of your cloth frequently to avoid placing tarnish back on the silver. You can use a Q-tip to get into small, detailed areas.
Be careful with silver-plated items, as excessive polishing can remove the plating (depending on the thickness) and leave pieces worse than when they started.
Soap and Water: Warm water and a mild, ammonia- and phosphate-free dishwashing soap should be your first line of defense if the polishing cloth fails to remove tarnish. Soap and water should also be used to clean your pieces before using any of the methods listed below.
Baking Soda and Water: Make a paste of baking soda and water and use a clean cloth to apply a pea-sized amount to the silver and polish. For etched, stamped or detailed items, thin the paste with more water and use a clean, soft-bristled toothbrush to get the cracks and crevices. Run the silver piece or pieces under running warm water, and dry with a clean cloth.
Olive Oil and Lemon Juice: Mix 1/2 cup lemon juice with 1 tsp. olive oil in a bowl large enough to hold the cleaning solution and a small microfiber cloth. Dip the cloth in the solution and wring it out so that it doesn’t drip, then polish the silver, rinse, and dry.
White Vinegar and Baking Soda: Use this gentle cleaner to remove heavy tarnish that’s preventing you from polishing your silver. Soak the tarnished piece in a solution of 1/2 cup white vinegar and 2 tbsp. baking soda for two to three hours, then rinse and dry.
Baking Soda, Salt, Aluminum Foil, and Boiling Water: You can take advantage of a simple chemical reaction to clean your silver. Line a glass roasting pan or the kitchen sink with aluminum foil, dull side facing down. Place the silver pieces on top of the aluminum foil. Then pour boiling water over the pieces until they are covered and add 2 tbsp. each of baking soda and salt. Stir the solution to allow the baking soda to dissolve — you don’t want any granules scratching the metal. (Not recommended for delicate pieces with semi-precious stones or pearl.)
The reaction causes the tarnish to transfer to the foil, and in about 5-10 minutes you’ll see the tarnish “magically” disappear from the jewelry. Rinse the jewelry with water, then dry and buff with a soft cloth. Voila! Your silver should be sparkling clean and ready to keep you looking fabulous.
Combination: If your pieces have very stubborn tarnish, you can use these treatments in succession to get them looking shiny again.
Garden statues add style to outdoor decor, but when continuously exposed to the various elements such as wind, rain, and heat, they are prone to weathering. If you love the weathered look – then you are in luck! Mother Nature wreaks havoc on outdoor decor, especially if you live in an area prone to harsh climate changes. But if you want to preserve your statues by weatherproofing them, it is quite simple with a few supplies and a little knowledge. With care, garden statues add a custom touch to yards for many years.
WAX SEALER
Coating statues with wax offers a high level of protection against water and rain. Car wax or any type of wax is usable. Application is simple by rubbing the wax over the entire statue with a cloth or sponge, and then wiping away excess residue.
WATER SEALER (allow to dry completely before touching)
Using a water sealer that is designed for concrete or masonry on statues that will be placed outside is extremely important. In fact, statue owners should do this once a year for all statues and especially for statues that hold water as part of their features, including birdbaths and fountains.
Water sealers come in many forms, including spray-on and paint varieties. Adding a thin layer often does the trick, and applying it once a year prolongs the life of the statue.
Wash the statue first to remove any dirt and debris.
Seal the bottom, as it wears over time, especially when sitting on a damp surface.
For statues that hold water, a heavy-duty water sealant is vital.
When sealing birdbaths or fountains, the statue should dry completely before refilling it with water.
REGULAR MAINTENANCE
Blow dirt off the statue using an air hose. Spray the statue with a garden hose to remove additional dirt or debris. Clean the statue every few months so the dirt and debris don’t build up on the surface.
Empty water before winter if the statue contains a fountain, bowl or birdbath. Remove the bowl of the birdbath or cover it with a board. Remove the pump from the fountain if present.
Move the statue to an indoor location if possible for the winter months. Lift the base of the statue off the ground if you leave it outdoors. Use wood or tiles to separate the statue from the ground.
Cover the statue during the winter with a tarp if you leave it outdoors. This will protect it from the weather. Secure the cover with string so it doesn’t blow off the statue. Statues that are delicate, antique, or have sentimental value fare better stored inside during harsh weather conditions. During freezes or extreme heat, placing the statues indoors or in a shed lengthens their life spans.
Garden statues last longer placed upon a paving stone, concrete block, or concrete pavement rather than in the dirt or lawn. Statuary is generally very durable, but a bit of help from human hands cannot hurt.
REPAIR if NEEDED (or desired)
Apply a thin coat of cement to cleaned and dampened areas that are cracked or chipped. Wet your finger to smooth out the cement. Allow the cement to dry for two hours. Mist the repaired area gently with water and wrap with plastic wrap. Mist the repaired area every day and replace the plastic wrap for five days.
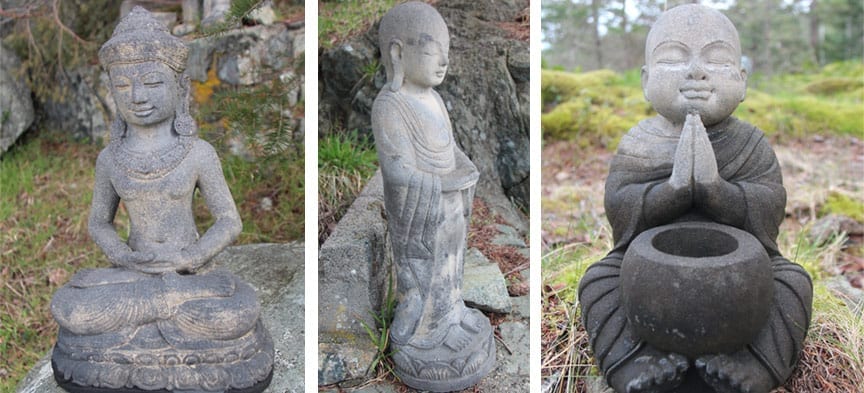
2010 STATUES on THE SUNSHINE COAST
These statues have not been treated and have been outside since 2010.
CARING FOR YOUR WOODEN ART:
A natural product, wood is bound to age, fade and possibly crack. Not much care is normally required, however, here are some suggestions to help preserve the beauty of your statues.
You can help prevent cracking by placing artwork in areas that are NOT in direct sunlight.
To clean your art pieces, use soft brushes, dusters or canned compressed air.
Colored wood putty can be used to fill the cracks if they really bother you.
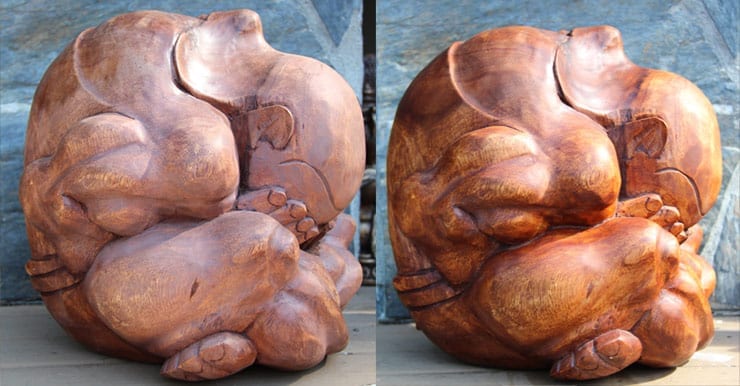
If your piece has faded, lemon oil is a good colourless product that can bring out the wood grain and add a little shine. The above picture of the Weeping Yogi demonstrates before and after lemon oil.
TO OIL:
Remove all excess dust.
- Apply lemon oil to a clean cotton cloth.
- Wipe the entire wood carving with the oil-soaked cloth. The piece will look wet as the oil gradually soaks into the wood. Wipe several times until the oil no longer soaks into the wood. A small layer of oil that sits on top of the wood piece will indicate that you have thoroughly saturated the carving with oil.
- Simply wipe this excess oil from the piece with the cloth.
- Allow the wood carving to dry before touching or using the piece. You will know it is dry when it feels dry to the touch.
- Repeat the mineral oil treatment every three to six months, or whenever the wood carving looks or feels dry or flaky.
Do not use water or detergents to clean your artifacts.
Direct sunlight should be avoided.
Keep your pieces away from excessive temperature and humidity fluctuations. When forced hot air heating is used in winter, humidifiers can help to reduce cracking and warping.